Nepathangka logo

Handcrafted Himalayan thangkas, singing bowls, statues, and jewellery, sourced from master artisans of Nepal.

Quick Links

  • Home
  • All Products
  • Blogs
  • About Us

Collections

  • Thangka Paintings
  • Singing Bowls
  • Sacred Statues
  • Jewellery

Support

  • Your Cart
  • Your Profile
  • FAQ
  • Privacy Policy
  • Shipping Policy
  • Return & Refund Policy
  • Cookie Policy
Top Thangkas
Top Singing Bowls

© 2026 Nepathangka. All Rights Reserved Designed and developed by Protozoa Host, powered by Nomor LLC.

Privacy Policy·Terms of service
  1. Home
  2. Blogs
  3. How a Thangka Is Painted: From Blank Canvas to Finished Work

Blog Article

How a Thangka Is Painted: From Blank Canvas to Finished Work

How a Thangka Is Painted: From Blank Canvas to Finished Work

Learn how a traditional thangka is painted, from preparing and priming the canvas to drawing the proportion grid, applying natural pigments, adding shading and gold work, and painting the eyes last. This guide explains each stage of thangka painting and the traditional techniques that shape the finished artwork.

By Nepathangka Editorial · , Editorial Team

October 8, 2026 · , 10 min read

On this page

  • The stages of thangka painting at a glance
  • Stage 1: Preparing the canvas
  • Stage 2: Laying out the proportion grid
  • Stage 3: Sketching the composition
  • Stage 4: Preparing the pigments
  • Traditional color sources
  • Stage 5: Applying color
  • Stage 6: Shading and outlining
  • Stage 7: Gold work
  • Stage 8: Painting the eyes
  • Stage 9: Mounting in brocade
  • Stage 10: Consecration
  • How long does a thangka take to paint?
  • Who paints thangkas?
  • Traditional methods vs. modern shortcuts
  • What the process tells you about quality
  • Proportions
  • Shading
  • Linework
  • Gold
  • Faces and eyes
  • The back of the canvas
  • Frequently asked questions
  • What is thangka canvas made of?
  • Are thangka pigments natural?
  • Why are the eyes painted last?
  • Do thangka painters follow a template?
  • Can anyone learn thangka painting?
  • Why are hand-painted thangkas expensive?

Overview

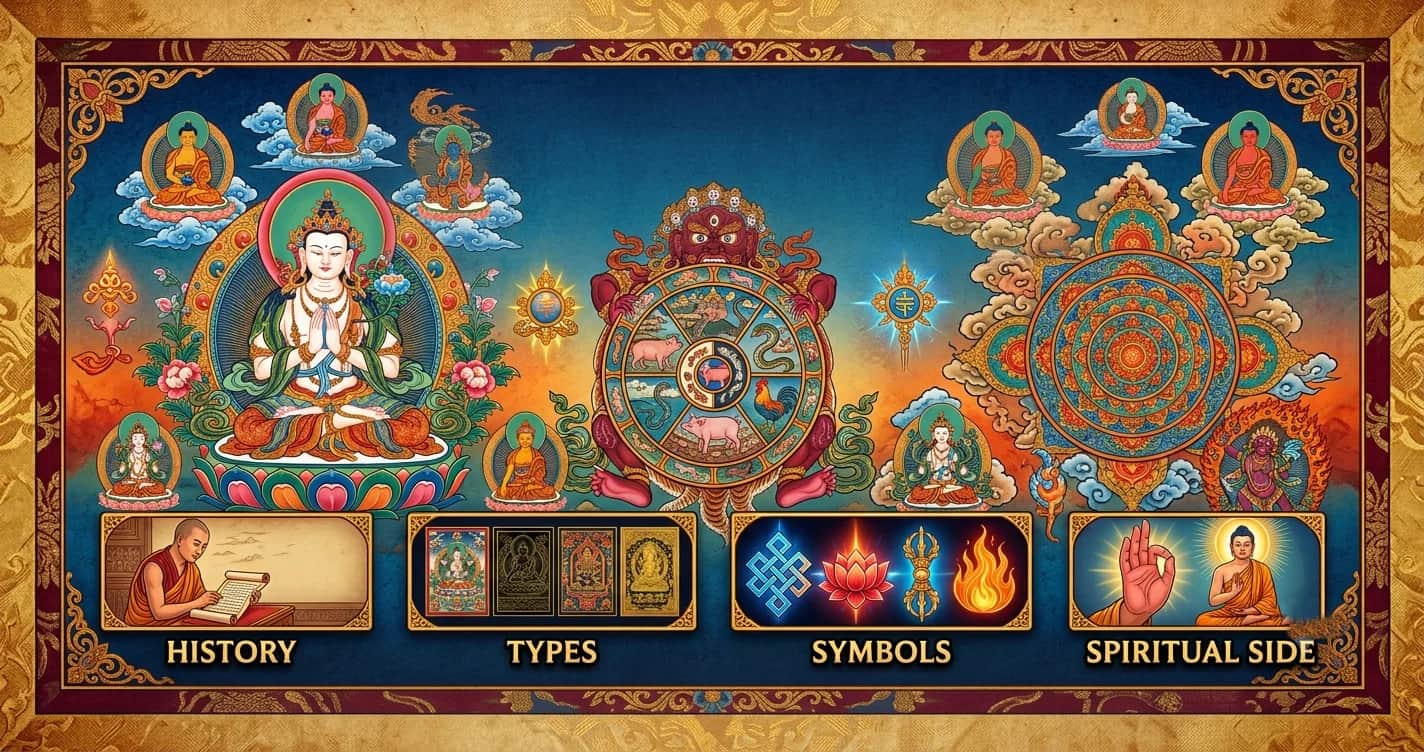
A thangka is painted in a slow, fixed sequence that has changed little over centuries. The painter starts with plain cotton, primes and polishes it into a smooth surface, then draws a measured grid that sets the proportions of every figure. The composition is sketched, colored with pigments ground from minerals and plants, shaded, outlined and finished with gold. The eyes are painted last. Finally, the painting is sewn into a brocade mount and consecrated. This guide walks through each stage, explains why it matters, and shows how the care taken at each step becomes visible in the finished work.

The stages of thangka painting at a glance

A traditional thangka moves through these stages:

  1. Preparing and priming the canvas
  2. Drawing the proportion grid
  3. Sketching the composition
  4. Grinding and mixing pigments
  5. Applying base colors
  6. Shading and outlining
  7. Applying and burnishing gold
  8. Painting the eyes
  9. Mounting the painting in brocade
  10. Consecration by a lama

Some workshops combine or reorder minor steps, but the overall logic stays the same: structure first, then color, then detail, then the final act that turns a painting into a sacred object.

Stage 1: Preparing the canvas

Most thangkas are painted on cotton. Silk is used less often. The fabric is first sewn along its edges to thin sticks, then laced with string into a larger wooden frame. Tightening the lacing pulls the cloth taut, a little like a drum skin.

Raw cotton is too absorbent to paint on, so it gets a coat of gesso. This is a mixture of animal hide glue and a white mineral base such as chalk or kaolin clay. The painter works it into the weave, lets it dry, and often adds more coats.

Then comes burnishing. While the gesso is still slightly damp, the painter rubs the surface with a smooth stone, shell or piece of glass. This presses the fibers flat and closes the pores of the weave. Holding the canvas up to the light is a common check: if pinpricks of light still show through, the surface needs more work.

This stage is easy to underestimate. A poorly primed canvas soaks up paint unevenly, makes fine lines blur, and is more likely to crack when the thangka is later rolled.

Stage 2: Laying out the proportion grid

Before anything is drawn, the painter lays down guidelines. The first is usually a vertical center line, followed by horizontals, diagonals and the borders of the painting. Traditionally, many of these lines are snapped onto the canvas with a chalk-dusted string.

On top of this framework, the painter measures out the central figure using a traditional system of proportion. Measurements are based on units tied to the figure itself. A common pair of units is the sor, roughly a finger-width, and the tho, a face-length made up of twelve sor.

Different classes of figure follow different schemes. A peaceful Buddha, a bodhisattva, a wrathful protector and a human teacher are all built to distinct proportions.

This is the stage where training shows most clearly. Students often spend a long time drawing the same figures on grids before they are allowed to paint at all. A thangka is meant to be a correct support for meditation, and an image with the wrong proportions is considered a faulty one, regardless of how beautiful its colors are.

Stage 3: Sketching the composition

With the grid in place, the painter sketches the figures and surroundings, usually in charcoal first. Charcoal lines can be brushed off and redrawn, which matters because the full composition often includes a main deity, secondary figures, thrones, halos, landscape, clouds and offerings, all of which have to fit together.

Once the drawing is settled, the lines are fixed in ink. In some workshops, the master also marks each area with a small code for its color. This lets apprentices fill in base colors while the master focuses on the drawing and the most demanding detail work.

Stage 4: Preparing the pigments

Traditional thangka colors come mostly from minerals, with some plant and organic sources. The raw material is ground by hand, often for hours, then mixed with hide glue and water to make paint. The fineness of the grind affects the result: some minerals shift in shade depending on how finely they are ground.

Traditional color sources

Color Traditional source Notes
Blue Azurite, occasionally lapis lazuli Azurite is the classic thangka blue; lapis is rarer and costly
Green Malachite Often used for landscapes and some deity bodies
Red and vermilion Cinnabar Brilliant red; toxic, so it is handled with care
Yellow Orpiment Toxic (contains arsenic)
White Chalk or kaolin clay Also the base for pale tints
Black Soot-based ink Used for outlines and dark areas
Transparent reds and blues Lac and indigo Organic dyes, useful for shading washes
Gold Powdered gold Mixed with glue; the most expensive material on the canvas

Because the paint is glue-based, it is usually kept warm while in use so the binder stays liquid. Many painters also make or shape their own brushes, including very fine ones for linework.

Stage 5: Applying color

Color is generally applied from the background forward. The sky comes first, then distant hills, water, clouds and vegetation, then thrones and halos, and finally the figures themselves. Working this way keeps the foreground crisp, because each layer is painted over what sits behind it.

Base colors are laid down as flat, even areas. At this point the painting can look surprisingly plain, almost like a colored diagram. Depth and life come in the next stages.

Stage 6: Shading and outlining

Shading is where a thangka starts to look three-dimensional. Painters build gradients by applying thin, transparent layers of dye or diluted pigment, or by working up tone with very fine strokes. Clouds, flower petals, drapery and body contours all get this treatment.

It is slow, patient work, and it is one of the clearest differences between a carefully painted thangka and a rushed one.

Outlining follows. Lines are drawn with fine brushes in ink or colored pigment, depending on what is being outlined. Skin tones, for example, are often outlined in a darker shade of the body color rather than stark black. Good outlines have confident, even pressure and taper cleanly at their ends.

Stage 7: Gold work

Gold is applied to ornaments, robe patterns, halos, thrones and fine highlight lines. The gold powder is mixed with a binder and painted on like other colors, then burnished once dry, commonly with an agate or similar smooth tool. Burnishing makes the gold shine and also compresses it into a harder layer.

Skilled painters can create more than one finish: matte gold beside polished gold, fine patterns drawn over a gold ground, or raised ornaments built up slightly from the surface before gilding.

On a black-ground or red-ground thangka, almost the entire image may be drawn in gold lines.

Stage 8: Painting the eyes

The eyes are traditionally painted last. This step is often described as "opening the eyes" and is treated with special care, sometimes done on a date chosen as auspicious. It is the moment the figure is felt to become present rather than simply depicted.

Practically, the eyes also carry the expression of the whole figure. A peaceful Buddha's downcast, calm gaze and a protector's wide, fierce stare both depend on a few precise strokes. It makes sense that this is saved for the end and for the most experienced hand.

Stage 9: Mounting in brocade

Once the painting is finished, it is cut from the frame and sewn into a textile mount, a job often done by a specialist rather than the painter.

The mount usually includes:

  • Narrow colored borders, often red and yellow, framing the painting directly.
  • A wider brocade surround, commonly silk with woven patterns.
  • A lower panel, sometimes in contrasting brocade, often described as a door into the painting.
  • Wooden rods at the top and bottom, the lower one often fitted with decorative end caps, so the thangka can be hung and rolled.
  • A silk veil that hangs in front of the painting, with ribbons to tie it up for viewing.

The mount protects the painting, but it also completes it. A thangka without its mount is considered unfinished in a traditional sense.

Stage 10: Consecration

A thangka intended for religious use is consecrated by a lama in a ritual that invites the enlightened presence into the image.

As part of the preparation, mantras are often written on the back of the canvas, commonly the syllables om, ah and hum, placed behind the figure's forehead, throat and heart.

Not every thangka sold today is consecrated. Many owners arrange consecration themselves after buying a painting, especially if it will be used on a shrine.

How long does a thangka take to paint?

It depends on size, complexity and quality.

A small thangka with a single figure and simple background might take a few weeks.

A medium-sized, detailed painting with a full landscape and gold work can take several months.

Large and highly intricate works, or paintings with many figures such as lineage trees or mandalas, can take a year or more.

Priming, drawing and shading tend to take longer than people expect. Filling in flat color is actually one of the faster stages.

Who paints thangkas?

Thangka painting is traditionally learned through a long apprenticeship with a master, often lasting several years.

Students begin with drawing and proportion, move on to preparing materials and filling in color, and only later take on shading, gold work and faces.

Today, thangka painting is taught and practiced in Tibet, Nepal, Bhutan, Ladakh, Mongolia and Tibetan communities in India.

The Kathmandu Valley, including Bhaktapur and the Boudhanath area, has a large number of workshops. In India, the Norbulingka Institute near Dharamshala is known for training painters in traditional methods.

Traditional methods vs. modern shortcuts

Not every thangka on the market follows every step described here.

Some common shortcuts include:

  • Synthetic paints instead of mineral pigments: Acrylic or gouache is faster and cheaper, and colors can look brighter and flatter.
  • Commercial pre-primed canvas: Used instead of hand-prepared gesso.
  • Printed or traced outlines: Used instead of a hand-drawn grid and sketch.
  • Imitation gold: Used instead of real gold powder.
  • Minimal shading: Saves a lot of time but leaves the painting looking flat.

None of these automatically makes a thangka worthless. A carefully painted piece with modern materials can still be a sincere and attractive work.

The issue is honesty: the price should reflect the materials and labor, and a good seller will tell you what was used.

What the process tells you about quality

Once you know how a thangka is painted, you can read quality from the surface.

Proportions

The main figure should look balanced and symmetrical, with a calm, correct posture. Awkward limbs or a lopsided face point to weak drawing.

Shading

Look closely at clouds, flowers and robes. Smooth, many-layered gradients indicate time and skill.

Linework

Fine lines should be clean and even, with no wobbles or blurring.

Gold

Real burnished gold has a warm, soft shine and often varies between matte and polished areas. Flat, brassy gold may be imitation.

Faces and eyes

These are the hardest parts to paint. A skilled painter's faces have a clear, consistent expression.

The back of the canvas

Hand-primed cotton has a distinctive texture, and mantras on the back suggest the painting was prepared for consecration.

Frequently asked questions

What is thangka canvas made of?

Usually cotton, primed with a gesso of animal hide glue and chalk or white clay, then burnished smooth. Silk is sometimes used instead.

Are thangka pigments natural?

Traditional thangkas use natural pigments ground from minerals such as azurite, malachite and cinnabar, plus plant and organic dyes like indigo and lac, and real gold.

Many modern thangkas use synthetic paints instead.

Why are the eyes painted last?

Painting the eyes is traditionally treated as bringing the image to life, so it is done at the end, often with special care or on an auspicious day.

Do thangka painters follow a template?

They follow a system of proportion rather than a copy. Each class of figure has set measurements based on units like the face-length and finger-width, which is why thangkas of the same deity share a structure while differing in color, landscape and detail.

Can anyone learn thangka painting?

Yes. Traditional training takes years under a master, but many schools and workshops in Nepal, India and elsewhere now accept students from different backgrounds, including short courses for beginners.

Why are hand-painted thangkas expensive?

The price reflects months of skilled labor, hand-ground mineral pigments, real gold and the painter's years of training. Materials alone can be costly, and the shading and gold work take a great deal of time.
About the author: Nepathangka Editorial

Editorial Team

The Nepathangka editorial team writes about thangka painting, Buddhist iconography and Himalayan craft. We work with the painters and metalworkers in Nepal whose pieces we sell, and every guide is checked with the artisans before it goes live.

View all articles by Nepathangka
XFacebookWhatsApp
  • Symbolic Thangka
  • Wealth Deity Thangka
  • Thangka Paintings

Keep Reading

The History of Thangka Painting

thangka

The History of Thangka Painting

Explore the history of thangka painting in Nepal and Tibet, from early Indian and Newar influences to the development of Tibetan painting schools such as Beri, Menri, Khyenri and Karma Gadri. Learn how these traditions evolved, how paubha and thangka painting differ, and why Nepal remains an important center for thangka art today.

Read Story
How Long Does It Take to Paint a Thangka?

thangka

How Long Does It Take to Paint a Thangka?

Learn how long it takes to paint a traditional thangka, from a few weeks for a simple piece to a year or more for large, detailed works. See what affects the painting time, including size, detail, shading, gold work, materials, and the painter's experience.

Read Story
What is thangka? Symbol, Art and History

thangka

What is thangka? Symbol, Art and History

The word "Thangka," for the first time, they are often unsure how to pronounce it. Some say "thagha," while others say "thangka." The correct pronunciation is "THAHNG-kah." Despite the different pronunciations, they all refer to the same ancient Buddhist painting tradition that originated in northern Nepal and the Tibetan region.

Read Story